Document Management
How to Set Password Protection in Taliho
Taliho’s Password Protection feature provides an easy way to restrict access to QR codes, allowing users to safeguard sensitive information. Passwords can be set for a single QR code, a group, or across the entire project, offering flexibility in access control. Here’s how to set up password protection for your QR codes.

Step 1: Access the Password Protection Function
Open Taliho and navigate to the Project Dashboard or the specific QR code you wish to protect.
Locate the password icon, represented by a lock symbol:
Unlocked (Grey): Indicates that the QR codes are public and unprotected.
Locked (Red): Indicates that the QR codes are password-protected.
Project-Level Protection: Clicking the password icon at the Project Dashboard level applies password protection across all QR codes in that group, using the same credentials.
Single QR Code Protection: If you want to password-protect a single QR code, click on that QR code to access its management page, then proceed with setting a password for it individually.
Step 2: Enable Password Protection and Customize Settings
Once you’ve identified where to apply the password protection, follow these steps:
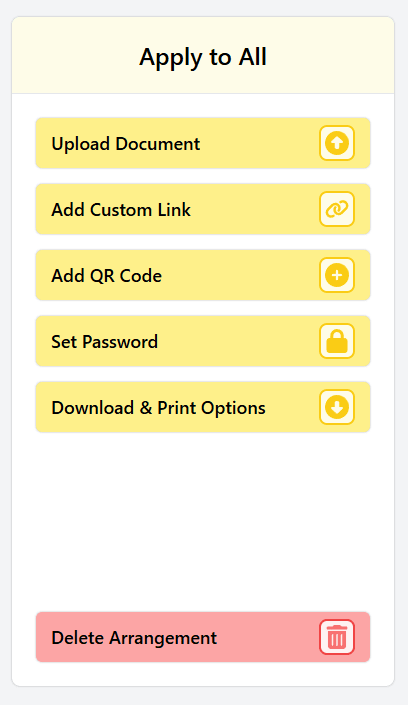
Click on “Set Password” to open the Set Password Protection pop-up window.
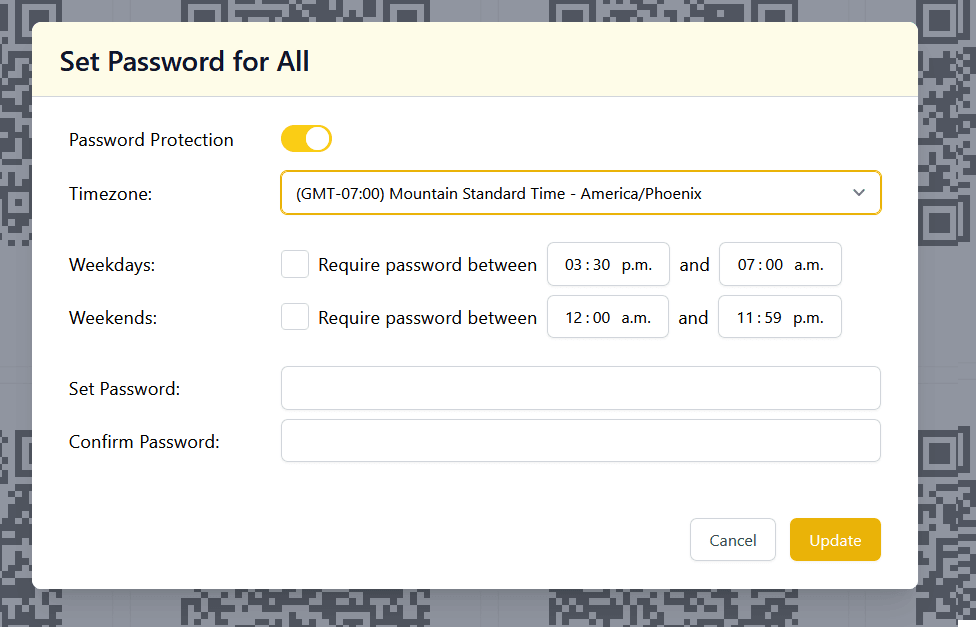
Switch the On/Off toggle to On, turning it orange to activate password protection. This action expands the window to reveal additional settings.
- Time-Based Protection: Taliho’s password protection operates on a schedule, allowing you to specify times when the QR codes require a password and when they do not. This setup is ideal for restricting access during non-working hours, such as after hours or on weekends.

Step 3: Configure Password Protection Settings
Once the window expands, you’ll need to set up the following options:
1. Timezone
Select the Timezone from the dropdown menu. Choose the timezone corresponding to the location of the QR code, ensuring the schedule aligns with the project’s region rather than the office location.
2. Weekday Schedule
In the Weekdays section, specify the protection schedule using two dropdown fields:
- Set Protection Time: Define the range during which the password is required, using the dropdowns to set start and end times. Ensure you select the correct AM/PM designation for accuracy.
3. Weekend Schedule
The Weekends section functions the same way as the weekdays, allowing you to set specific times for password protection on weekends.
4. Set Password and Confirm Password
Set Password: Enter the desired password for the QR code(s).
Confirm Password: Retype the password to verify accuracy.
5. Apply to Entire Project (Optional)
If you want the password settings and schedule to apply to all QR codes within the project, check the box that indicates this option.
Step 4: Finalize or Cancel
Update: Click "Update" to save the settings and apply password protection with the selected schedule and settings.
Cancel: If you choose not to proceed, click Cancel to close the pop-up without saving changes.
Taliho’s Password Protection feature offers flexible, scheduled access control for QR codes, making it easy to restrict visibility based on time and location. By following these steps, you can confidently protect sensitive information, ensuring only authorized users access critical project data.

