QR Codes and Groupings
How to Download & Print Options in Taliho
The Download & Print Options feature in Taliho offers users flexibility in downloading and printing QR codes. This function is useful for both posting project data on-site and tagging equipment with QR labels. Here’s a complete guide to using these options.
Step 1: Access Download & Print Options

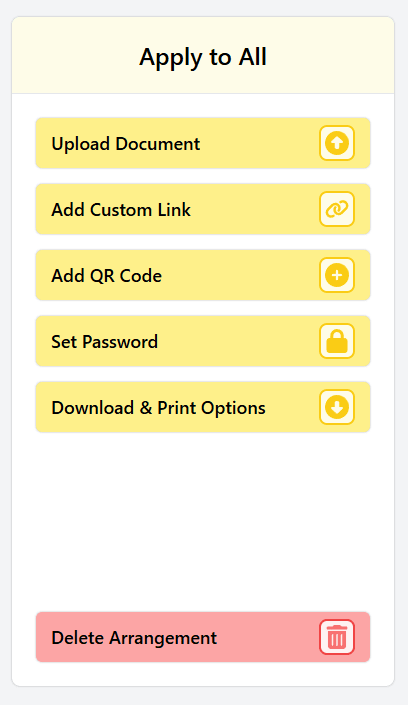
Navigate to Taliho and locate the QR code or arrangement where you want to download or print QR codes.
Click the "Download & Print Options" button, which opens a pop-up window with two main choices: Download PDF or Print Labels.

Step 2: Using the Download PDF Option
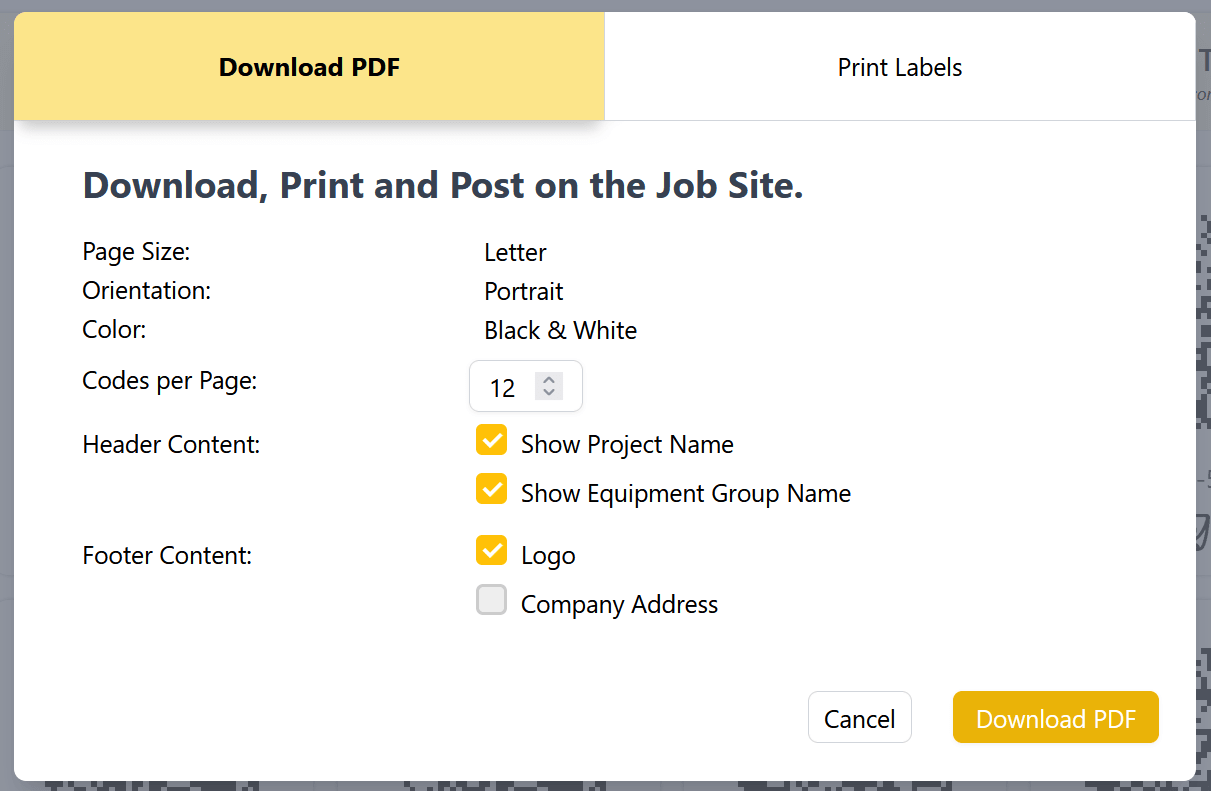
When the Download PDF option is selected, you’ll see a set of controls for configuring how the QR codes will appear on the PDF.
Preset Information
The following settings are preset and not adjustable by the user:
Page Size: Set to “Letter” (8.5 x 11 inches).
Orientation: Set to “Portrait.”
Color: Set to “Black & White.”
Codes Per Page
Input Field: Use this field to determine how many QR codes will appear per page. The maximum allowed per page is 12.
Automatic Default: Taliho automatically defaults this number based on the number of QR codes you have in an arrangement. For example, if there are six codes, the box defaults to six but can be changed to any number between 1 and 6.
Header Content
This section includes two options for what content appears in the header:
Show Project Name
Show QR Arrangement Name
You can select one, both, or neither of these options. If no options are selected, Taliho will display a default header reading “Project & Equipment Information.”
Footer Content
For the footer, you have two options but can only select one:
Logo: Displays the company logo in the footer.
Company Address: Shows the company address in the footer.
Choose the one that best suits your document needs.
Finalize the PDF Download
Once satisfied with your selections:
Click "Download PDF" to create and open the file in a new browser tab, where it can be downloaded and printed.
Alternatively, select Cancel to exit without saving.
Step 3: Using the Print Labels Option

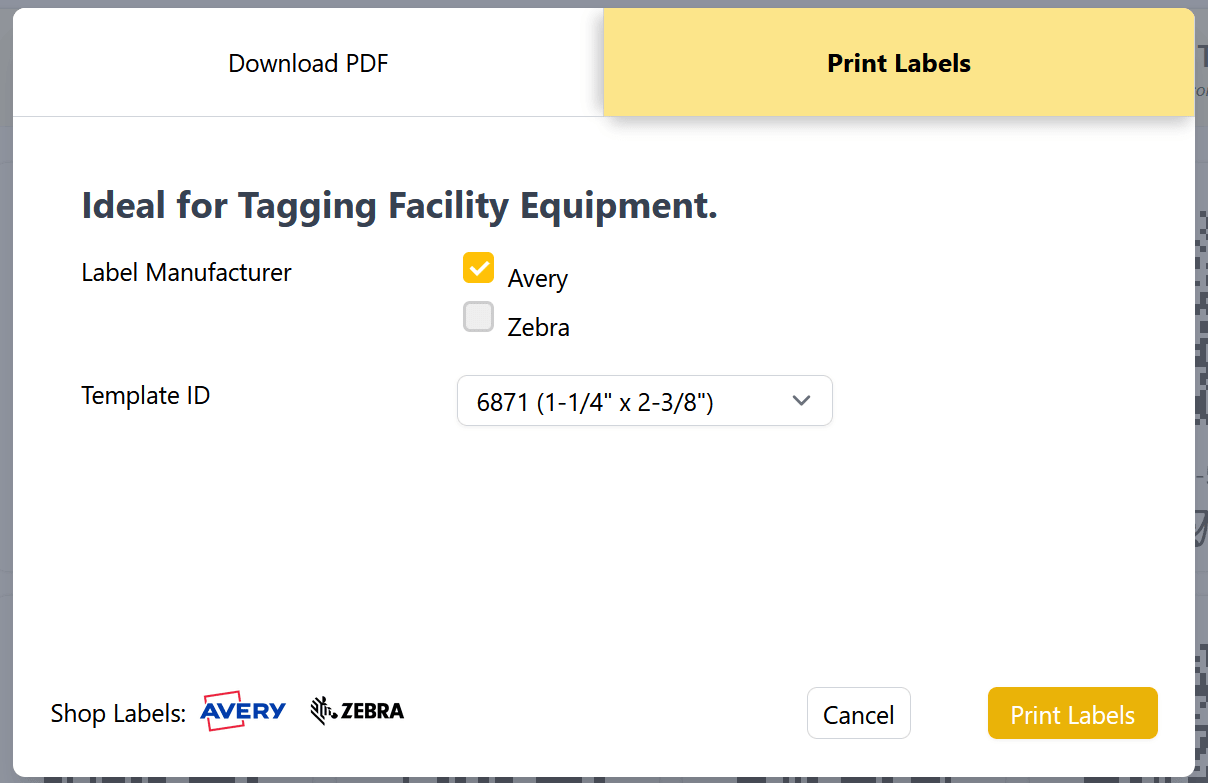
The Print Labels option is ideal for generating labels suited for tagging equipment. Here’s how to configure these settings:
Select Label Manufacturer: Choose between Avery or Zebra as the label manufacturer.
- Shop Labels: There’s a Shop Labels link in the bottom left of the pop-up, directing you to Avery and Zebra’s online stores for purchasing labels and compatible printers.
Choose Template ID: After selecting a manufacturer, use the Template ID dropdown to select from Taliho’s pre-configured templates for that brand.
- Custom Templates: If you need a template not listed, contact Taliho support at support@taliho.com to request specific templates for Avery or Zebra products.
Finalize Label Printing
After setting up label details:
Click "Print Labels" to proceed with printing.
Or, select Cancel to close the pop-up without saving any changes.
Taliho’s Download & Print Options give users the flexibility to customize QR code output, whether for PDFs or labels. By following these steps, you can ensure that printed materials are tailored to your project’s needs, streamlining on-site data access and equipment tagging.

